Night Vision Image Effect in Unity 3D
In this tutorial, I will be showing how to create a night vision effect in Unity.
Night Vision is an image effect that enhances visibility in low-light settings. The effect is often used in video games to mimic real-life night vision goggles.
For demonstration purposes, I will be using a Small Cave Kit from the Asset Store.

To make a night vision effect in Unity we’ll be using a special Shader and a post-processing script.
Step 1: Create the Image Effect Shader
The image effect itself is done with the help of a custom Shader.
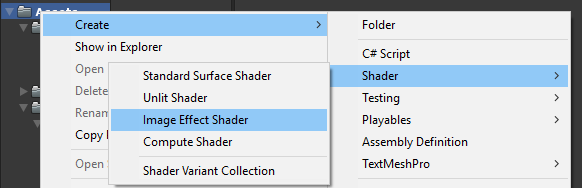
- Create new Shader (Create -> Shader -> Image Effect Shader) and name it “NightVisionShader”
- Remove everything inside it then paste the code below:
NightVisionShader.shader
Shader "Hidden/Night Vision" {

	Properties {
		_MainTex ("Base (RGB)", RECT) = "white" {}
	}

	SubShader {
		Pass {
			ZTest Always Cull Off ZWrite Off
			Fog { Mode off }

			CGPROGRAM
				#pragma vertex vert_img
				#pragma fragment frag
				#pragma fragmentoption ARB_precision_hint_fastest
				#include "UnityCG.cginc"

				// frag shaders data
				uniform sampler2D _MainTex;
				uniform float4 _Luminance;
				uniform float _LensRadius;

				// frag shader
				float4 frag (v2f_img i) : COLOR
				{

					float4 col = tex2D(_MainTex, i.uv);

					//obtain luminance value
					col = dot(col, _Luminance);

					//add lens circle effect
					//(could be optimised by using texture)
					float dist = distance(i.uv, float2(0.5, 0.5));
					col *= smoothstep( _LensRadius,  _LensRadius - 0.34, dist);

					//add rb to the brightest pixels
					col.r = max (col.r - 0.75, 0) * 4;

					// return col pixel
					return col;
				}
			ENDCG

		}
	}

	Fallback off
}
Step 2: Create the Post-Processing Script
The post-processing script will use Unity’s OnRenderImage function to get the RenderTexture of the Screen, then feed it into material that will use a NightVision Shader.
- Create a new script and name it “NightVisionImageEffect”
- Paste the code below inside it:
NightVisionImageEffect.cs
using UnityEngine;

[RequireComponent(typeof(Camera))]
[ExecuteInEditMode]

public class NightVisionImageEffect : MonoBehaviour
{
    // Public data
    public Shader shader;
    [Range(0f, 1f)]
    public float luminance = 0.44f;
    [Range(0.5f, 1f)]
    public float lensRadius = 0.84f;
    // Private data
    Material material;

    // Called by Camera to apply image effect
    void OnRenderImage(RenderTexture source, RenderTexture destination)
    {
        if (shader != null)
        {
            if (!material)
            {
                material = new Material(shader);
            }
            material.SetVector("_Luminance", new Vector4(luminance, luminance, luminance, luminance));
            material.SetFloat("_LensRadius", lensRadius);
            Graphics.Blit(source, destination, material);
        }
        else
        {
            Graphics.Blit(source, destination);
        }
    }
}- Attach NightVisionImageEffect script to any Camera
- Assign Shader variable with a newly created NightVision Shader

Tip: Tweak the Luminance and Lens Radius sliders to achieve the desired effect
The Night Vision Image Effect is now ready.
Before:

After:
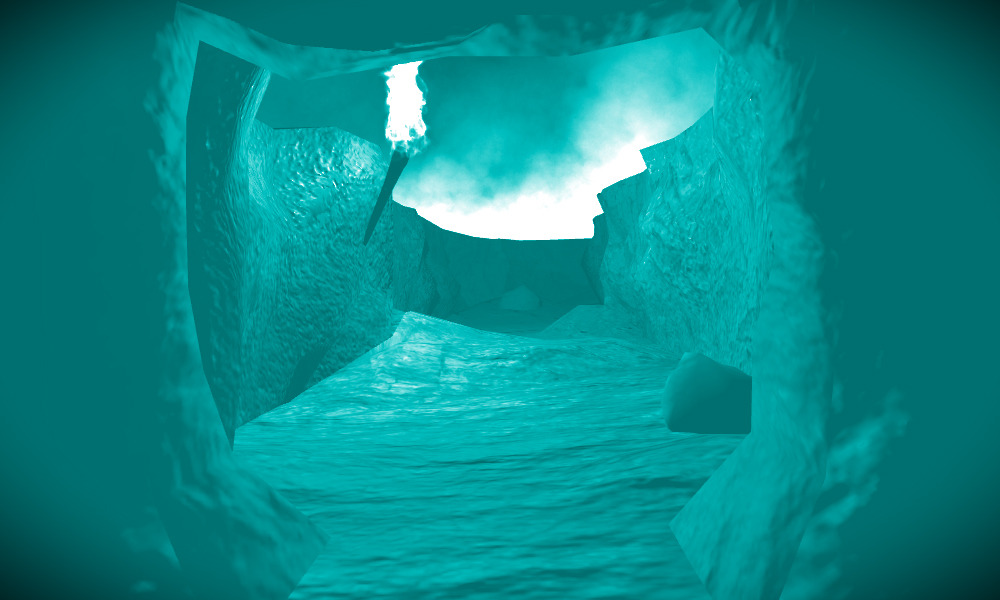
Everything works as expected.