Unity 3D RTS/MOBA Player Controller
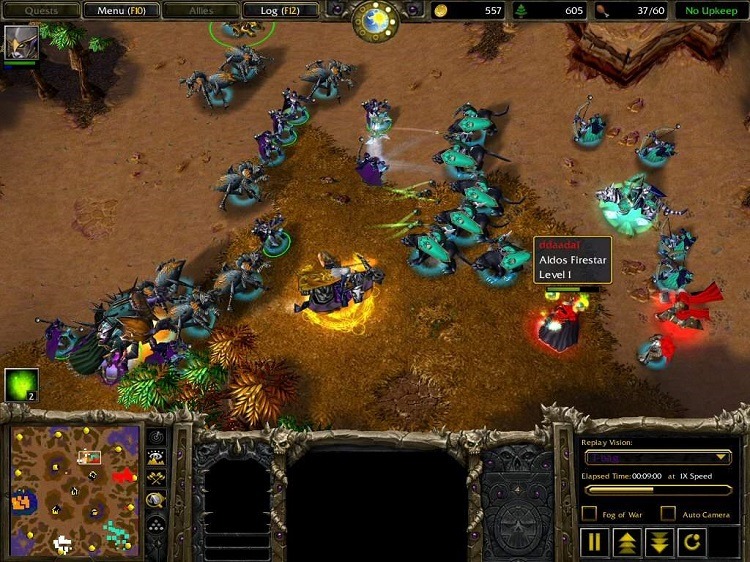
In video games, the term RTS stands for Real-time strategy.
The difference between RTS and conventional First / Third Person shooter games is that the characters are controlled using the mouse pointer rather than the usual W, A, S, D buttons.
The player is given an eagle-eye view of the battlefield with the ability to give orders to the troops, without directly controlling them. Examples of RTS games are Warcraft, Starcraft, Cossacks, etc.
On the other hand, MOBA stands for Multiplayer Online Battle Arena, it’s a somewhat newer subgenre of RTS games where the player controls just one character instead of many.
Examples of such games are League of Legends and Dota 2.
In this tutorial, I will be showing how to create an RTS/MOBA style controller in Unity 3D.
Step 1: Let’s create the necessary script(s)
This tutorial is quite simple, as it only requires one script.
RTSPlayerController.cs
//You are free to use this script in Free or Commercial projects
//sharpcoderblog.com @2018

using UnityEngine;
using UnityEngine.AI;

[RequireComponent(typeof(NavMeshAgent))]

public class RTSPlayerController : MonoBehaviour
{
    public Camera playerCamera;
    public Vector3 cameraOffset;
    public GameObject targetIndicatorPrefab;
    NavMeshAgent agent;
    GameObject targetObject;

    // Use this for initialization
    void Start()
    {
        agent = GetComponent<NavMeshAgent>();
        //Instantiate click target prefab
        if (targetIndicatorPrefab)
        {
            targetObject = Instantiate(targetIndicatorPrefab, Vector3.zero, Quaternion.identity) as GameObject;
            targetObject.SetActive(false);
        }
    }

    // Update is called once per frame
    void Update()
    {
#if (UNITY_ANDROID || UNITY_IOS || UNITY_WP8 || UNITY_WP8_1) && !UNITY_EDITOR
            //Handle mobile touch input
            for (var i = 0; i < Input.touchCount; ++i)
            {
                Touch touch = Input.GetTouch(i);

                if (touch.phase == TouchPhase.Began)
                {
                    MoveToTarget(touch.position);
                }
            }
#else
        //Handle mouse input
        if (Input.GetKeyDown(KeyCode.Mouse0))
        {
            MoveToTarget(Input.mousePosition);
        }
#endif

        //Camera follow
        playerCamera.transform.position = Vector3.Lerp(playerCamera.transform.position, transform.position + cameraOffset, Time.deltaTime * 7.4f);
        playerCamera.transform.LookAt(transform);
    }

    void MoveToTarget(Vector2 posOnScreen)
    {
        //print("Move To: " + new Vector2(posOnScreen.x, Screen.height - posOnScreen.y));

        Ray screenRay = playerCamera.ScreenPointToRay(posOnScreen);

        RaycastHit hit;
        if (Physics.Raycast(screenRay, out hit, 75))
        {
            agent.destination = hit.point;

            //Show marker where we clicked
            if (targetObject)
            {
                targetObject.transform.position = agent.destination;
                targetObject.SetActive(true);
            }
        }
    }
}
Step 2
Now let’s set up a player controller and game level.
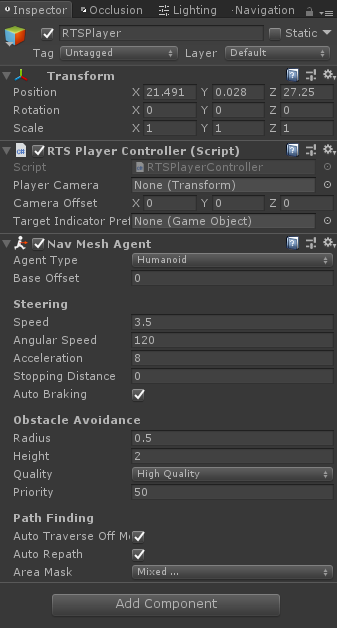
- Create a new GameObject and call it ‘RTSPlayer’
- Add RTSPlayerController.cs component to it (NOTE: Upon adding, it will automatically add another component called NavMeshAgent, this component will be needed later)
- Now add a player body (in my case I will be using a simple capsule with a cube, but you can add a player model if you have any). Scale it down until the desired size.
- Move the player model inside the ‘RTSPlayer’ GameObject (NOTE: Before parenting, make sure ‘RTSPlayer’ is placed at the bottom of the player model)


- Select ‘RTSPlayer’ and in NavMeshAgent tweak the Radius and Height until it matches the player model

- Now let’s create a target Indicator prefab. This is just a simple GameObject with a Quad that will indicate where we have clicked on the map.


You can use the texture below:

- And lastly, select ‘RTSPlayer’ and assign all the necessary variables at the RTSPlayerController:
Player Camera – is self-explanatory, this can be any camera
Camera Offset – how far the camera should be from the player
Target Indicator Prefab – the prefab we just created

While in Play mode, you’ll notice that clicking on the map does not make the player move. That’s because we have one last thing to do, which is Bake a Navigation mesh (navmesh):
- Select all the objects that are part of the map and mark them static:


- Go to Window -> AI -> Navigation

- Under the Bake tab change the values of Agent Radius and Agent Height (those should match the values from NavMeshAgent), then click Bake.

- After Baking is finished you’ll notice a bluish outlined mesh, which represents the walkable area.

NOTE: To prevent the player from walking over the hills, go back to the Bake tab and decrease the Max Slope angle then rebake navmesh.


Much better!
Finally, go back to Play mode and left-click somewhere on the map.
The player should now move towards the target while avoiding the obstacles:
Tip: Tweak Speed, Angular Speed, and Acceleration value at NavMeshagent to fit your needs.